In this blog, I am going to tell you how I made my own base-lit lightsaber and how you can do the same yourself. I am also going to point out mistakes that I made along the way and ways that you can ideally do it better.
My cost was around $150 USD
Your cost (ideally): $80 USD
*This is a cost estimation based on things that I've learned along the way. There are several ways I could've cut down my cost*
My Estimations:
- Lighting - $10 (or more depending on your choice)
- Blade - $25
- Hilt - $45ish (I think thats pretty generous but maybe not)
WHY BUILD YOUR OWN?
1) If done right, this can be a cheaper option than buying from lightsaber companies
2) You have get to customize this is any way that you want. This was the big reason for me.
I wanted to have the experience of crafting my own lightsaber, so I was willing to spend a little extra because mine would be completely unique (however, I have now learned that I could've saved myself a lot of money).
LIGHTING THE BLADE
This is the MOST IMPORTANT part of the build as the entire project revolves around it.
This is the part that you need to buy first before anything else.
There are several approaches to this.
Approach 1) Lightsaber Core, i.e. the expensive route. **Don't rule this out just yet because it can be a very good option**
Many lightsaber companies will sell a "Lightsaber core." This essentially is a stick with everything you need in it. These often come with charging ports and the ability to change your lightsaber color. To my understanding, most of these also come with a soundboard and speaker.
These are usually about 1" in diameter and will run you around $50-110+ depending on the product and depending on the company.
If you are looking to build a lightsaber with sounds, I would say this the way to go.
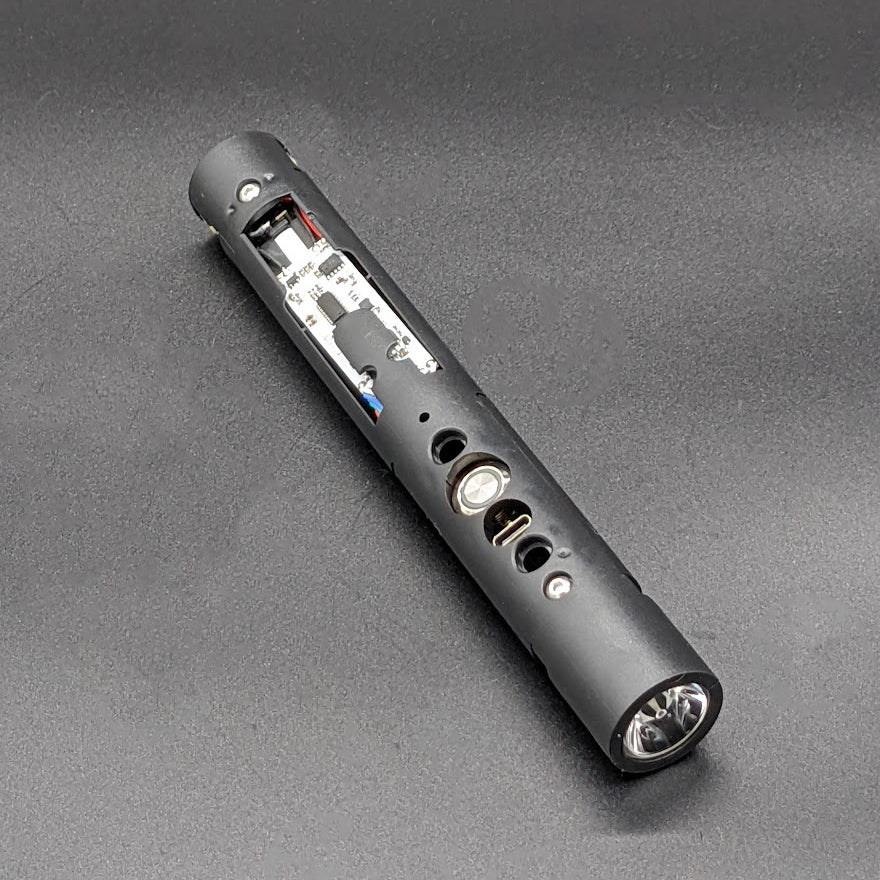
Approach 2) Buying an electronics kit. (This was the route I chose)
There are many sellers on Etsy (and probably other sites) who make an electronics kit for lightsabers. This gives you the ability to choose from several colors (upon purchase); whichever color you choose is the color you get,
unlike the Lightsaber Core where you can change the color with the push of a button.
This route gives you the freedom to position the button pretty much anywhere you want.
The one I got was $40 but the one from the image above was $50. It seems like this kit is of higher quality than the one I purchased (The one shown is probably brighter, the battery is smaller making it easier to fit inside the hilt, and the led itself looks solid), but here's the thing: if you're going to spend that much anyways, just get the core. I used my 3d printer to make a holder that essentially turned it in to a crappy version of the lightsaber core.
This worked... but not very well. I was able to make everything fit for the most part, but I think it just made things more difficult for me.
Nevertheless, it's an option.
Approach 3) Using a Flashlight. This is the route I wish I had taken (**MY RECOMMENDATION**)
This is definitely going to be your cheapest route. You could theoretically use a flashlight that you have, but amazon sells really good (and bright) flashlights for SOOOOO much cheaper than buying an electronics kit. There are two ways to go about this one.
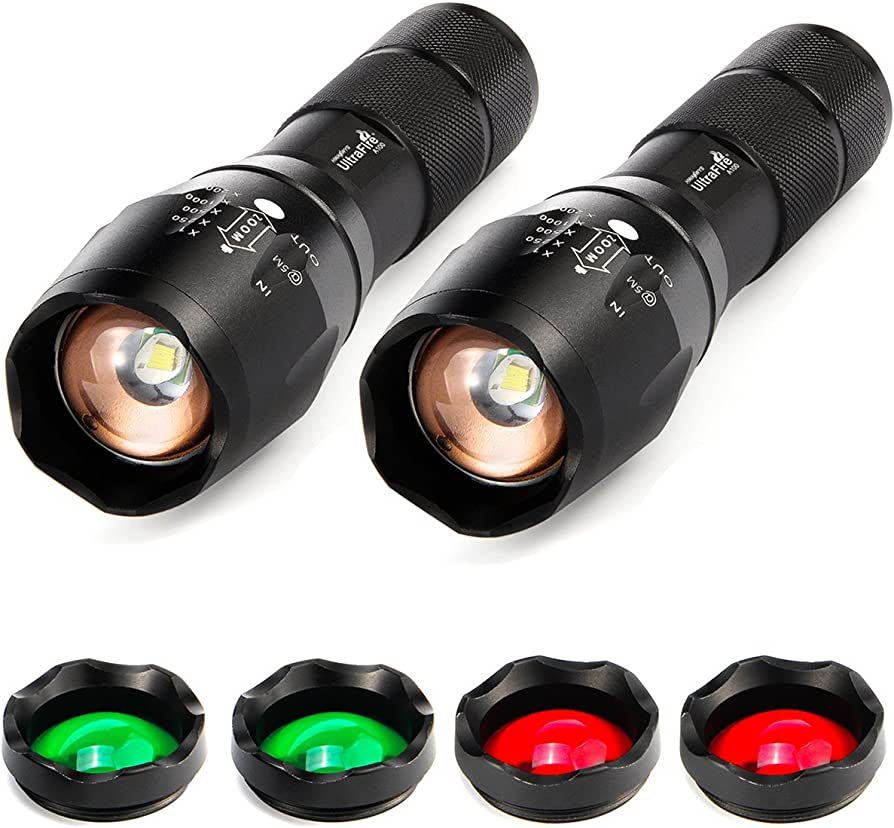
a) Colored Flashlight:
I have found a couple of flashlights on amazon that go for around $10 and they are brighter and significantly cheaper.
These seem to be made in 4 colors only (White, Red, Green, Blue)
This is unfortunate for me because I would love to have a yellow lightsaber.
On Amazon, I was not able to find a flashlight that would do colors other than the above. However, google has been able to provide me with some more options (slightly more expensive though)
b) Color Filter:
The second approach to the flashlight method would be just using a normal white flashlight and getting a colored filter to put over the light.
I'm not as familiar with this route, but I think it's definitely worth exploring.
For both the colored flashlight and the lens flashlight:
- The tricky part is going to be figuring out how to quickly and easily turn the thing on and off when it's inside the hilt.
THE BLADE:
For this part of the build you will need to decide whether you want to buy an actual blade from a company or person on etsy that makes lightsaber tubes or if you would like to build it yourself.
I bought mine off of etsy, but I realized that I probably could've saved money by building it myself with similar results.
Here is a video that I thought was very helpful for the blade in particular:
Synopsis:
- You buy 1" polycarbonate tubing and cut it down to your desired length. Then you take clear cellophane, wrap it tightly around a dowel, then put the dowel inside of your tube and gentle unwind the cellophane. Then you hot glue the top and bottom edges of the cellophane to the tube. Then put a cap on the top.
See how much it would be to get 3ft of polycarbonate tube at your local hardware store.
Blade Length:
Most blades will come in sizes 16", 24", 32", or 36"
You're going to want a blade that is around 32 - 36." I bought a 40" blade and it was obnoxiously long so I cut it down to about 36" (3 of those inches are tucked inside the hilt). I'm 6'0" so if you are shorter, like 5'9 or less, I would recommend 32". For reference, Carly King (fairly popular lightsaber enthusiast) is around 5'5" and she frequently mentions that she like the 32" blade ("best for spinning").
These will be around $20-$30 (before shipping and tax)
THE HILT
Like I mentioned earlier, you need to get your light source figure out before you worry about the hilt. I would also recommend you get your blade as well because you are going to need to figure out you to secure it to your hilt (especially if you want it to be removable like mine).
I had to go through several different experimentations before I found one that worked and looked decent (because whats the point if it doesn't look cool?).
Let me briefly break down how I built my hilt.
1) You really have to think outside of the box. You're not always going to find pieces that are supposed to work together, instead, you find ways to make it work.
2) Type of material. I wanted my entire hilt to be metal. It's a little heavier than I wanted it to be but thats ok because it feels SOLID. However, metal is more restrictive and harder to work with than plastic. I'm sure there is a happy medium where both can be used.
3) Making it fit FIRST before you think about adding all the bells and whistles.
My solution:
I got most (if not all) of my hilt parts from Home Depot.
**Calipers are really helpful for part searching, but tape measures or rulers will also do just fine**
I found the most success in the electrical section but the plumbing section may also have some good options (possibly more expensive though). I used the hardware section for the butt of my hilt (screws, washers, nuts, etc).
I used a 6" metal tube that had an inner diameter of 1" to house the blade and the led light very nicely. This tube had screw grooves on both ends.
- It is the part that is covered with black string in the picture above
To secure the blade, I found two different couplers. The top one had the look I was going for and the bottom one helped secure it while also giving it an Anakin Skywalker sort of thing there.
The wiring was tricky to house, but I eventually was able to make it work.
Now comes the fun part.
Once you find something that works, you can customize the absolute crap out of it.
I think that leather wrapping looks very very very cool, but I did not want to spend that money so I used some black string that I found at Michaels
I also wanted it to have a bit of a battle-worn, weathered look to it, so I beat it up a bit.
Another thing that you can do is paint it black and then lightly sand the whole thing
Here's an example of someone who did that really well ^^^
- This video is only about the hilt. The maker did not put any electronics or blade compatibility
- This video is also really good for getting some ideas on visuals
End Notes:
- I am thinking about making a new lightsaber using a flashlight as my light source. If it works well, I will let you all know how it went.
I hope this was helpful... I want to help you in the process of building your lightsaber so please let me know if you have any questions!


Comments
Post a Comment